



New updates are regularly released for WordPress. These may expand the application’s range of features or even improve its security and performance. Once a new update is released, you should update your website as soon as possible.
You can usually start updates directly from the backend of your WordPress website. However, the backend or even your entire website may no longer work properly if you don’t install any updates for an extended period. Then you’ll need to update WordPress manually. We’ll walk you through the process in these step-by-step instructions.
Create a backup
We recommend that you back up all your website’s files and databases before any update. In the event of a failed update, you can then restore your website to its previous state at any time.
To create a backup, follow the steps in the first two sections of these instructions: How do I create a backup or emergency restore?
Install the new version
There are several ways to install the new WordPress version:
- You can upload the files using the Explorer in the Hostpoint Control Panel.
- You can upload the files via an FTP client (by establishing an FTP connection to your web hosting).
- If you’re familiar with SSH, you can also perform the update via WP-CLI.
The following steps show you how to do this using the Explorer.
Download the version
Download the latest version from the official WordPress website:
https://wordpress.org/download/
Then unzip the downloaded ZIP file to your computer.
Delete folders
- Log in to the Hostpoint Control Panel with your Hostpoint ID.
- Open your web hosting.
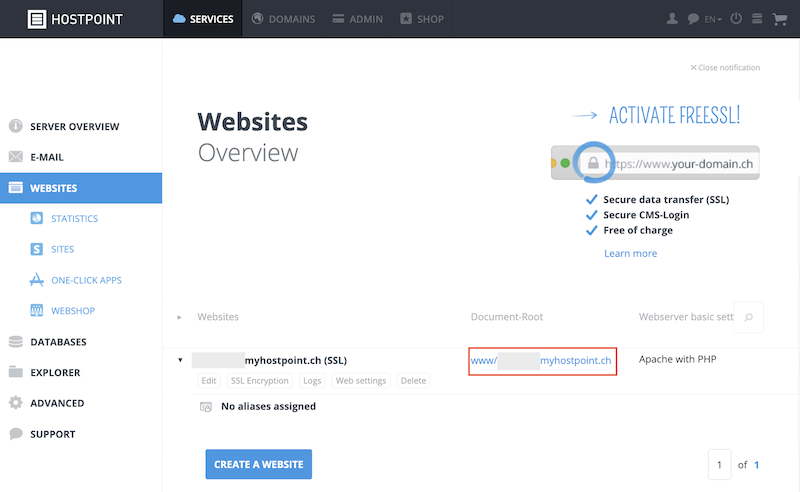
- Click “Websites” in the menu.
- Click the blue document root for your website.
- Delete the wp-admin and wp-includes folders.
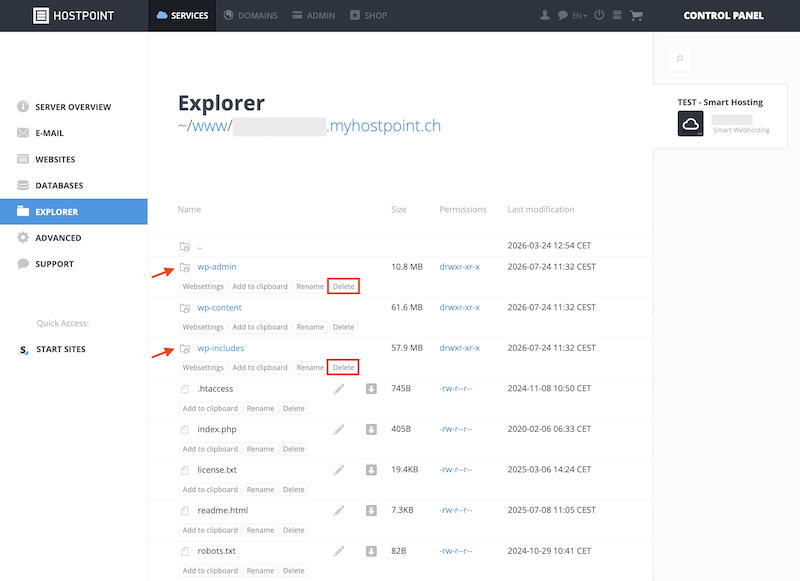
Please note: The wp-content folder contains your plugins and themes and should not be deleted under any circumstances.
Upload the files
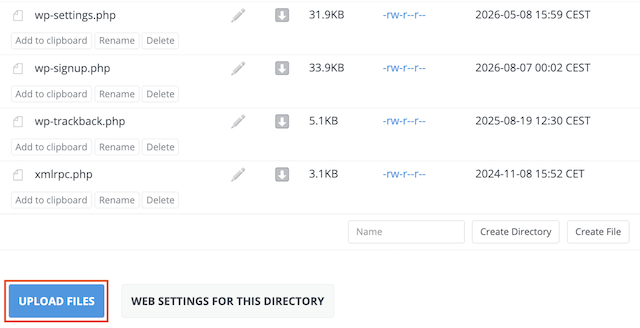
- Click “Upload files” at the very bottom.
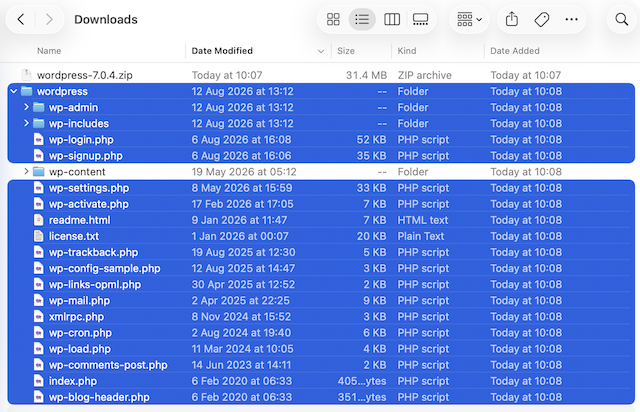
- Now open the file manager on your computer (e.g. Windows Explorer or Mac Finder) and navigate to the folder where you saved the new WordPress version (usually Downloads).
- Select all folders and files except the wp-content folder and drag them into the gray field in Explorer.
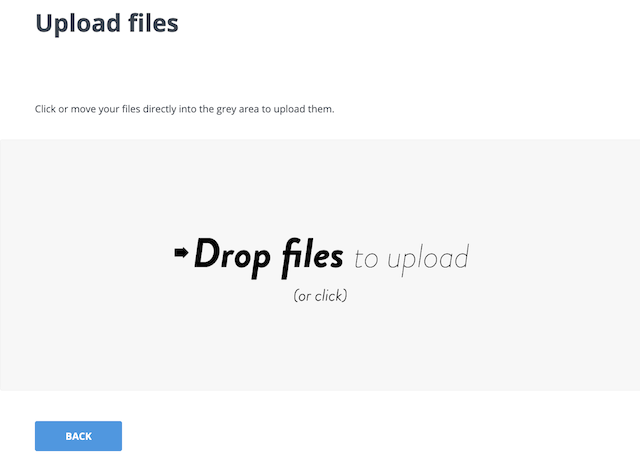
→ The files will be uploaded. As there are a lot of files, the upload may take a few minutes. - Click “Back” once all the files have been uploaded.
→ In the file overview, you should now see all the files and folders for the new WordPress version.
Test the update
After completing the manual update, check whether WordPress and your website are available again:
- Go to the backend of your WordPress website. If you have not changed the corresponding URL, it will be {DOMAIN}/wp-login.php.
- Log in with your login details and check the following:
- Can your website be accessed through your domain? Is everything working as expected?
- Do any plugins or themes need to be updated? If so, it’s best to carry out these updates right away.
- If WordPress asks you to update the database, perform the database update according to the instructions.

For support requests please use this form instead.

