



If you order a web hosting, Webshop or Managed Flex Server solution from Hostpoint, you will receive free access to our AI website assistant for WordPress, depending on the product you choose. This will help you create your own WordPress website. In this article, we’ll show you what the assistant can do and how you can use it.
What is the AI website assistant?
The AI website assistant is a WordPress plugin that lets you create your own website in no time at all. The plugin consists of several elements:
- Guided onboarding
- Personalized dashboard
- Chatbot/AI agent
Instead of building your WordPress website yourself, you can specify the purpose, appearance and scope of your website at the start. Based on the information you provide, the AI assistant will then automatically create the basic framework for your website.
You can then start filling your website with content and customizing it to suit your needs. You can make changes to the page yourself or ask the AI agent to do so via chat.
Setting up WordPress
Setting up WordPress with AI consists of two steps:
- Install WordPress
- Create a basic structure for the website
Requirements
The AI website assistant is available with the following Hostpoint hosting products:
| Product | Number of websites with AI assistant |
|---|---|
| Web hosting | |
| Smart | 1 |
| Business | 3 |
| Webshop | |
| S | 3 |
| M | 3 |
| L | 3 |
| XL | 3 |
| Managed Flex Server | |
| S | 5 |
| M | 5 |
| L | 5 |
| XL | 5 |
| XXL | 5 |
Installing WordPress
To use the assistant, you need to install WordPress with AI assistant as a one-click app in your web hosting account.
Follow these steps:
- Log in to the Hostpoint Control Panel with your Hostpoint ID.
- Open your web hosting, Webshop or Managed Flex Server solution.
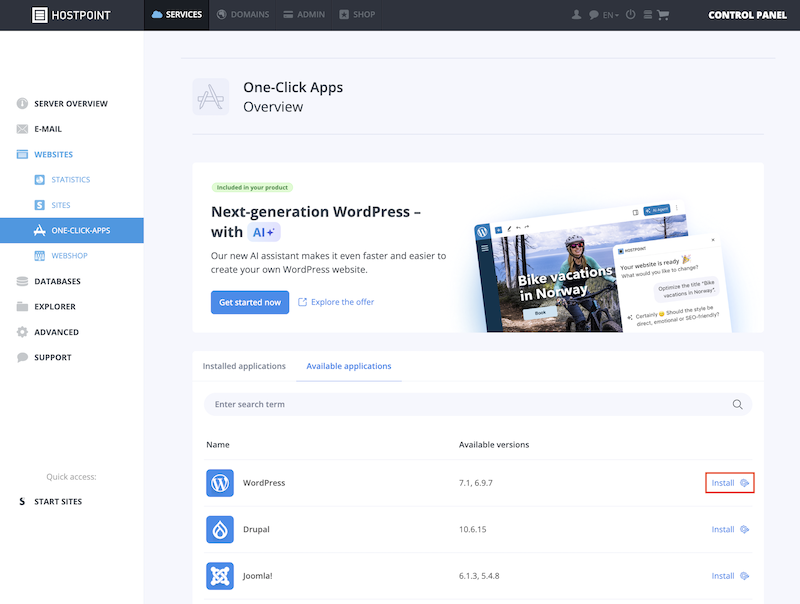
- Click on “Websites” in the menu and then on “One-click apps”.
- Go to the “Available applications” tab and click “Install” under WordPress.
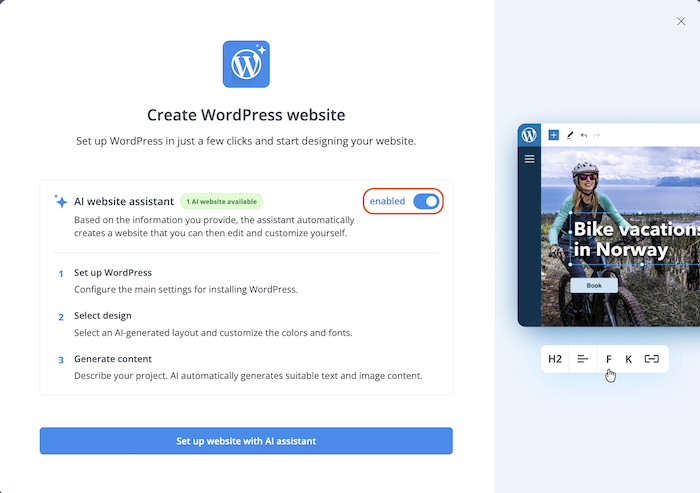
- Activate the “AI website assistant” option and click on “Set up website with AI assistant”.
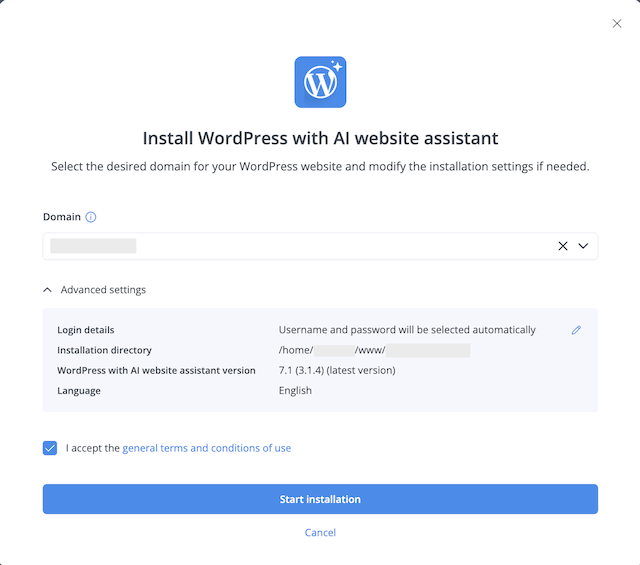
- Select the domain under which the website should be accessible.
- Check the advanced settings for the installation and adjust them if necessary.
- Login details: Username and password for logging into WordPress. You can either set the login details automatically or choose them yourself.
- Installation directory: WordPress will be installed in this directory, and all files for your website will be stored here.
- WordPress version: Select the version of WordPress that you want to install on your hosting server.
- Language: Select the language in which WordPress will be installed. It can be changed later at any time.
- Accept the general terms and conditions of use and click on “Start installation”.
→ WordPress will now be installed on your hosting server. - If you have generated the login details automatically, they will be displayed after installation for one time only. Save your login details in a secure place.
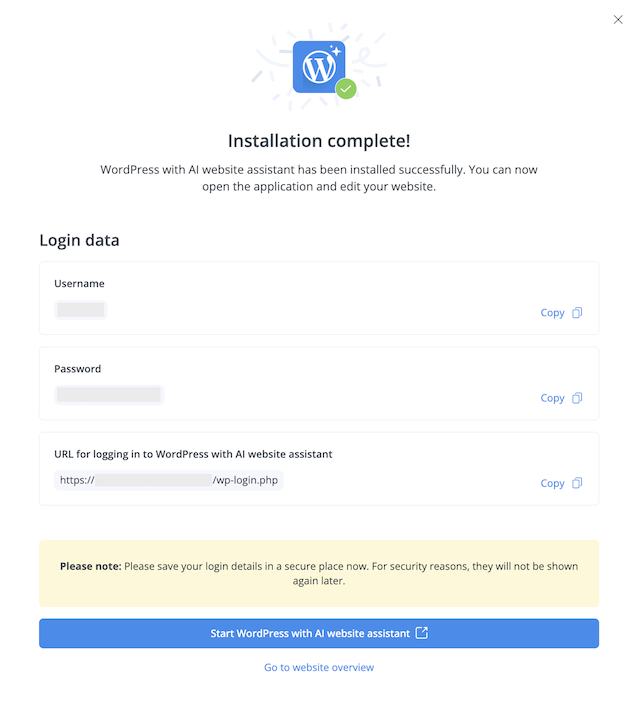
- Complete the installation by clicking “Start WordPress with AI website assistant”.
→ WordPress has been installed and your website is ready to edit.
Creating a basic structure for the website
After logging into WordPress with your login details, you should see the following homepage:
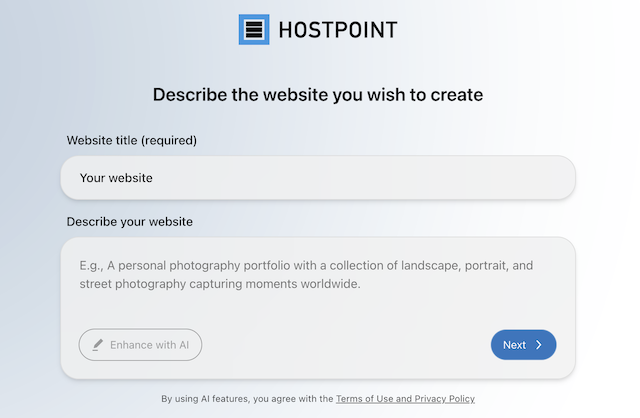
Give your website a title and describe as precisely as possible what type of website you want to create.
The following questions may help:
- What is the purpose of the website?
- Which target group do you want to address?
- What pages and content do you need for your website?
- What should your website look like? What style do you have in mind?
If you are satisfied with your description, click “Next”.
Based on your specifications, the AI assistant will then create the basic structure of your website. It will install appropriate plugins and suggest suitable designs for you.
Editing the website
Once the basic structure of your website is in place, you can start editing it and entering content. You can find suggestions and tips for this in WordPress under “Site Assistant”.
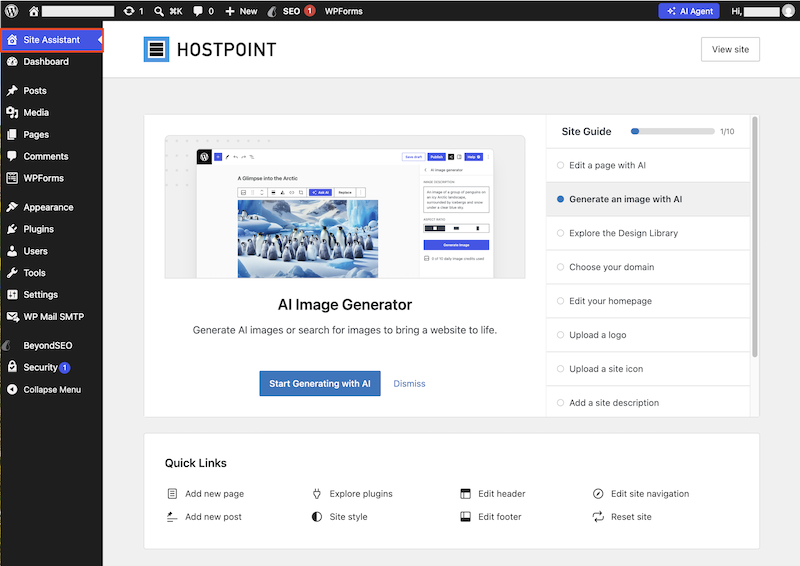
When you visit your website, you will see the chatbot in the left sidebar.
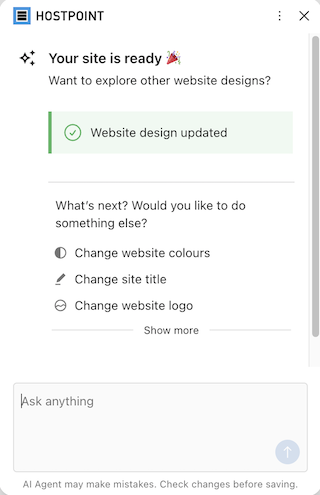
However, you can also access the chatbot at any time via the “AI Agent” feature in the title bar of the WordPress backend and ask it questions or request that it makes changes.
The website assistant can perform the following tasks for you:
- Create new pages
- Customize the design (fonts, colors, logo, etc.)
- Generate and insert text or images
- Proofread and improve existing texts
- Translate texts
- Install plugins
When making changes to the website (text, images, design), you always receive a preview first. Only when you confirm the changes in the chat will they actually be executed.

For support requests please use this form instead.

